Showing posts with label tutorial. Show all posts

Friday, April 5, 2013

DIY: How to Add Patina to a Chandelier

A few months ago, I found this semi mangled chandelier on the side of the road next to the garbage. Talk about a curb side treasure! So, I did this manic U-turn, pulled into an awkward driveway and loaded it up. It also comes with those gold lampshades, but we most likely won't use them for now. What is your opinion, shades or no shades? Living in a rental, we can't put this up, besides, it is too big for our place with such low ceilings.


Our Downtown Studio salon is switching the massage and Jacuzzi room, with our large party/lounge area, and I knew this chandelier would be perfect for lighting since it is pretty dark. Pics of our gorgeous set up here! We spray painted the "candlesticks"  black and got some of the vintage candle flame looking light bulbs. I used a patina-like sea foam green color and dry brushed it on for an aged look, and in some parts, did more of a watercolor wash. I am probably going to add a second patina color and then do a little bit of sanding on the "patina" to really age it. We usually don't like the bright gold, but it works in here and really shines up the rustic glam feel. And of course, I want to add strands of drippy prisms from the bottom. It will be gorgeous and I will most definitely include photos of the finished project!


It's not really work when you love what you are doing!
 

Finished Product! At Downtown Studio Salon's massage and spa room.
 
Pin It

signature lisa 180x80 180ppi

Saturday, March 30, 2013

Easy DIY Spring Easter Egg Wreath Tutorial


I have had this wintery wreath on my door since well, winter. I figured, I had better update it, but didn't have the time.  First, I tucked the berries and pinecones behind the wreath. I grabbed this egg garland I already had and tied it onto the wreath with twine and craft pearls to tame the pine needles back, and then I tucked some fake flowers in there. I think it turned out really cute! It took less than 10 minutes, required absolutely zero sewing or gluing, and I can take it apart in minutes if I want to reuse the materials again.


Recycling holiday crafts and supplies is the best!


You can also take a figurine, like my adorable little bunny here, and glue or wire it down. So, Easter is tomorrow... you have *plenty* of time to do something like this!


Also, tonight we will be planting a magical Easter jellybean garden, along with many other pinterest inspired families. In the morning, lollipops or peeps should arise in their place... hopefully these beans work!


Friday, January 25, 2013

Homefront: Monster Birthday Party and Tie Dye Cake Tutorial

This monster party was mostly for me. My boys would probably choose an Angry Birds/Avengers/Minecraft party, but I still have motherly influence while they are young, so I can only do these cute themes for so long.
 
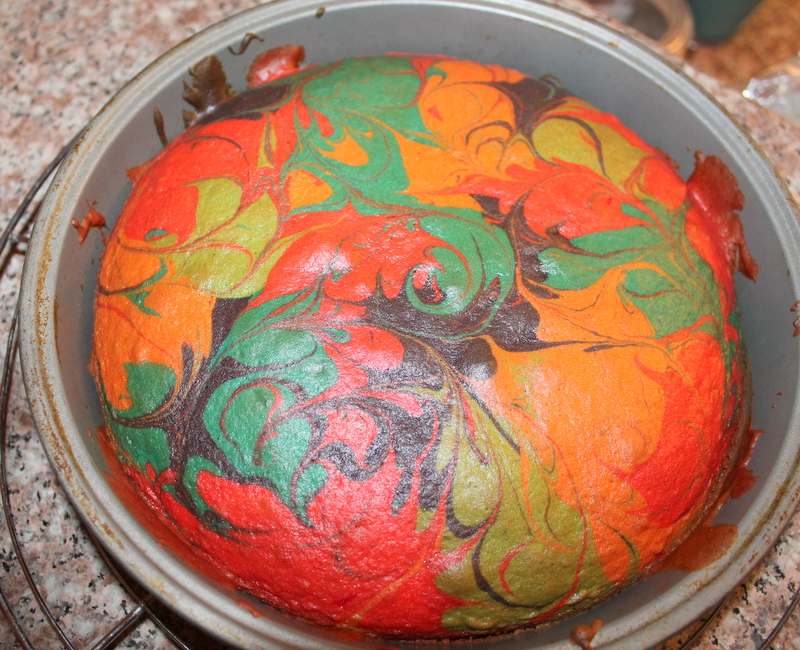
The tie day cake was a hit and super easy to do. Make your cake batter as directed. Separate it into bowls and color each one. Gel food coloring is brighter than the liquid drops. The more dye you use, the brighter the colors. Drop the colored batter in your pans, then take a toothpick to marble them around.

Once baked, the colors lose a bit of their vibrancy, but once you cut into the cake, the colors really pop. Slice off the round top of the bottom tier and place on cake stand. Frost the middle layer, than add the next cake on top. Use foil strips under the cake sides (as I show here) so the frosting is easy to clean off the stand.

For the monster, the edible method is to skewer two large marshmallows with a toothpick (as in this cupcake I learned to make a while back). But I was out of marshmallows, so I used a cake pick and wrapped it in foil, than just gooped frosting on it. The pipe cleaner antenna is best to wrap around a toothpick, than wrap the foil around it before frosting. I forgot about this step and added it after the frosting. So, my monster looked more like a melted alien after messing with it. For the cool fur texture on the cupcake, I used the star/grass piping tip, and a denser icing. The neat eyeballs are little monster eye candies sold in the cake decorating aisle.
These little pipe cleaner kits and monster masks were about $1 from Michael's. I let the boys glue them together with regular school glue, than I hit it with my glue gun for staying power, since we all know how they would fall apart in seconds otherwise. The boys had lots of fun making these. This was his first birthday he got to invite a non-family member. We made english muffin pizzas for dinner, though Isaac insisted on chicken noodle soup with stars. (He even asked me if he could sleep with the can.)
 Turning 7 and blowing out trick candles is lots of fun!
My 5 year old recently had a birthday in which I made a fun, sprinkle filled cake with vintage dinosaurs and we hung up tons of balloons in his doorway he could run through. Sadly, those photos got lost :( Sorry sweetie, if I ever find them hidden in a folder somewhere I will post them! When he blew out the candles, his wish was for "Jesus to come down so we could all see him and know he was there."
Pin It
signature lisa 180x80 180ppi

Sunday, January 20, 2013

DIY: Easy Jersey Flower Headband from Cut Off Yoga Pants


Being the short person that I am, I have many pants which are too long. So, I took these super comfy grey jersey pants and cut a few inches off the bottom. When I looked at my leftovers, I was like, hmmm... surely something can be made from that?! So, I instantly thought, "headbands".

I put one piece around baby girl's head and pinched a section to fit, then I safety pinned it so I had the right amount of fabric to work with. Then, I got out a needle and thread and simply worked that pinched section into sort of like a blossom, ruched type flower piece. I really just manipulated the fabric with the needle into the shape I wanted. It took me longer to find my scissors than it took for me to make this headband. The raw edge just rolls over so no need to even sew that part. I kind of like the detail from the hem on the other side, but you can always cut the hem off for more of a uniform look.

I took the cut off from the other leg and pulled it over my ears. Instant earwarmers for momma! :)  This is the kind of craft I like, fast, easy, very little mess or supplies, can easily be reworked if it doesn't turn out and it's free!

Pin It
signature lisa 180x80 180ppi

Monday, November 19, 2012

Memory and Gratitude Jar Craft Tutorial

 This memory and thankful/gratitude jars are extremely easy and simple to make. You can spend next to nothing, or go all out on supplies. Most of the time, you can just find things around the house to use to embellish your jars.

These would make great gifts! Imagine, a teacher gift, where the students write down things they appreciate about the teacher. Or a grandparent, and each grandchild/child write down things they love about grandma and a happy memory. Ooh, or a baby or bridal shower, where each person in attendance writes down a fond memory of the guest of honor and a word of advice on motherhood or marriage! It would make a touching memorial for someone who has passed on, filled with memories and trinkets of that person. The jars can hold, candles or flowers, and would look lovely on a wedding table. You can really do anything with them. And best of all, they are really fun to make with family and friends! It would be fun for a little girl's birthday party activity! Everyone just brings some ribbon, lace, twine, odds and ends and have fun together.


In my memory jars, I use items to decorate based on that memory, then fill the jars up with photos and memorabilia. Here, I have a baby and wedding jar. The butterfly pin I wore on my wedding dress and the one in the jar was on my cake. The ribbons are fragments used in my bouquet. NUME is a silly little inside joke with my husband. For the baby jar, I put her baby bow on there, and tied it with trim and ribbons. Inside, is the fabric trim we used on her blessing headband, that also matched her blessing dress that her aunt made her. I still need to fill these jars up, but you see where I am going with this. Imagine having a shelf or  with lots of little memory jars, for births, vacations, special occasions, or just because.


For the gratitude jar,. you fill it with paper scraps. You can have some method, like every Sunday night, each family member writes something they are thankful for, and include special memories or funny conversations with your kids on the paper scraps. You read them all together at Thanksgiving. Then, you can staple them together in a paper chain for your Christmas tree. Start the tradition each year and add to your paper chain for a fun, annual activity. Reading old memories and moments of gratitude from past years will really bring back some tender and silly moments each year that otherwise may have been long forgotten.


HOW TO MAKE:
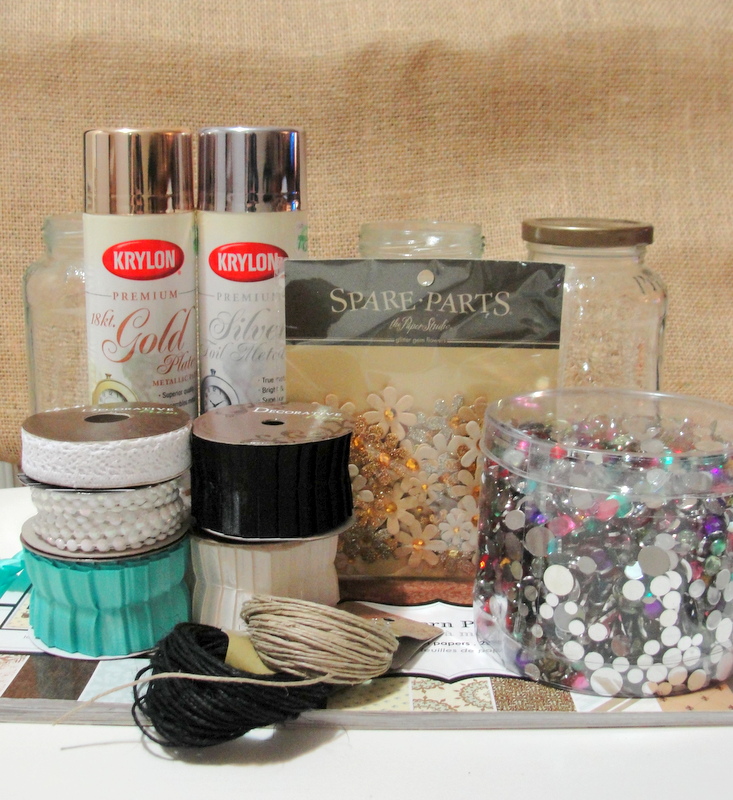
Hot soapy water and vinegar are both great for cleaning sticky labels off of the glass. Lightly sand your jar lid if you want, prime with spray paint, then spray paint your desired color. A few very light coats makes for a cleaner look and better coverage than a thick coat of paint. I used hot glue to secure the cut burlap strips, then the ribbon can be glue on or tied on. Any kind of embellishments work. Making your own embellishments, such as rolled fabric flower s (tutorial) are easy and cheap. There are tons of tutorials on how to make paper and fabric flowers, or you can just buy some as well.


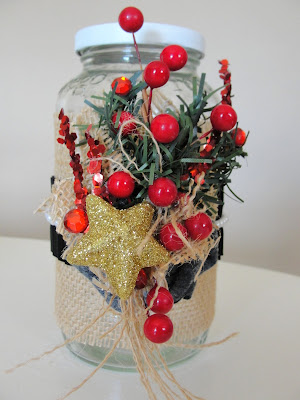
I even made a plain jar, with holiday themed 'corsages' that I can change throughout the seasons. There is no right or wrong way. We made these at a recent craft night and everyone's jars turned out wonderful. I would love to see if you make one and how you use it :)

Pin It
signature lisa 180x80 180ppi
Related Posts with Thumbnails