I know, I always choose the most proper timing for news.... but a separation leading to divorce around the same time as a cross country move will take a person away from blog-land for a while. But you know, all good things eventually come to an end of some sort, which is exactly how this cake will end up, dirty dishes in the sink :)
Showing posts with label sweet treats. Show all posts
Friday, February 14, 2014
Sweet Treats: Happy Valentine's Day - 2014
I know, I always choose the most proper timing for news.... but a separation leading to divorce around the same time as a cross country move will take a person away from blog-land for a while. But you know, all good things eventually come to an end of some sort, which is exactly how this cake will end up, dirty dishes in the sink :)
Friday, July 26, 2013
Sweet Treats: Summer Berry Cool Whip Cake
I am taking a little summer vacation to see family and get crap done, so I leave you with a treat that I like to think is *healthy*, and takes but minutes to make. We have made this cake a few times this summer. The fun thing is, you can play with what fruits and berries (cherries, kiwi, banana, blueberry, blackberry, raspberry, strawberry, mandarin oranges) you want to use and the frosting too. I used chocolate frosting this time, but last time I used pink lemonade frosting and it was amazing!! Plus, you can make it all pretty and festive!!
Slice your angel food cake in half and frost the middle. Top that with chopped strawberries.
I added extra dollups of cool-whip to decorate the top. Then add your berries, sprinkles, chocolate shavings, fresh mint leaves, shredded coconut or whatever. The cake tastes best if you chill it for at least 30 minutes. And enjoy, for a light and fluffy, refreshing summer treat!

Mix together some of your cool whip and a frosting flavor of your choice.
I added extra dollups of cool-whip to decorate the top. Then add your berries, sprinkles, chocolate shavings, fresh mint leaves, shredded coconut or whatever. The cake tastes best if you chill it for at least 30 minutes. And enjoy, for a light and fluffy, refreshing summer treat!
Friday, January 25, 2013
Homefront: Monster Birthday Party and Tie Dye Cake Tutorial
This monster party was mostly for me. My boys would probably choose an Angry Birds/Avengers/Minecraft party, but I still have motherly influence while they are young, so I can only do these cute themes for so long.
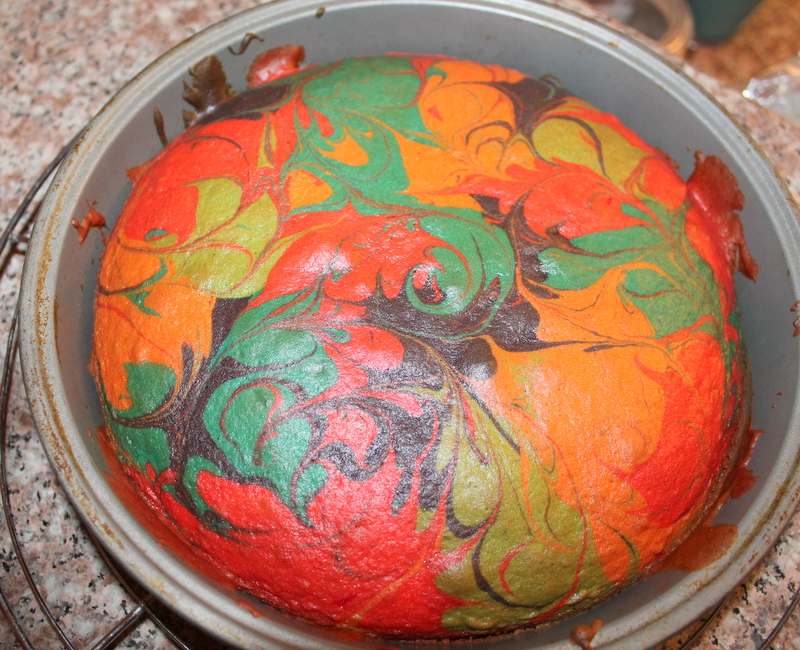
The tie day cake was a hit and super easy to do. Make your cake batter as directed. Separate it into bowls and color each one. Gel food coloring is brighter than the liquid drops. The more dye you use, the brighter the colors. Drop the colored batter in your pans, then take a toothpick to marble them around.Once baked, the colors lose a bit of their vibrancy, but once you cut into the cake, the colors really pop. Slice off the round top of the bottom tier and place on cake stand. Frost the middle layer, than add the next cake on top. Use foil strips under the cake sides (as I show here) so the frosting is easy to clean off the stand.
These little pipe cleaner kits and monster masks were about $1 from Michael's. I let the boys glue them together with regular school glue, than I hit it with my glue gun for staying power, since we all know how they would fall apart in seconds otherwise. The boys had lots of fun making these. This was his first birthday he got to invite a non-family member. We made english muffin pizzas for dinner, though Isaac insisted on chicken noodle soup with stars. (He even asked me if he could sleep with the can.)
Turning 7 and blowing out trick candles is lots of fun!
Thursday, December 20, 2012
Sweet Treats: Festive Chocolate Stirring Spoons Recipe
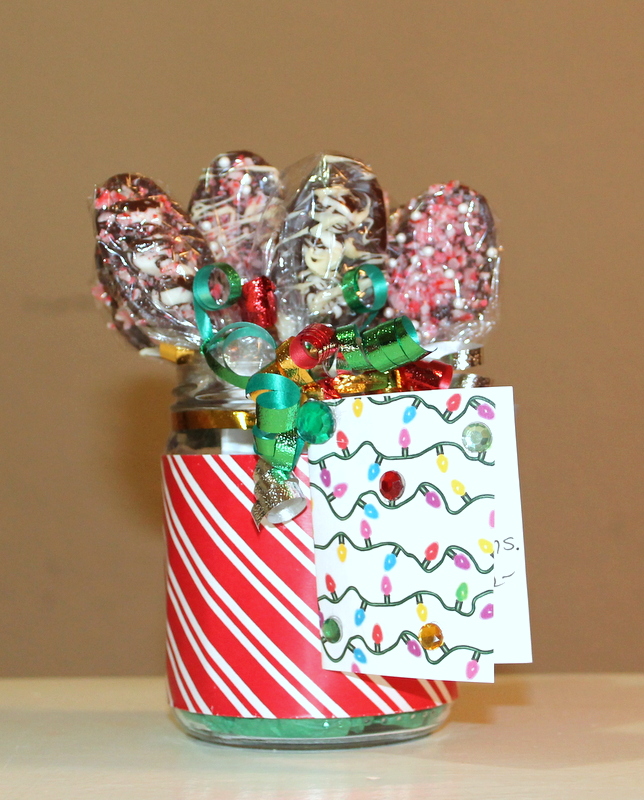
We made stirring spoons for the boys' teachers. The ones for the teachers we tied with curling ribbon, and ornament and a gift card. Then, I made a cute jar (ideas and tutorial here) and filled them with several more spoons for the office staff. These are easy, fast, and inexpensive to make... and not to mention delicious! Makes a great treat for your cup of hot chocolate or coffee.
I put one candy cane in a ziplock bag and crushed it (a rolling pin is good, I just banged the hell out of it with a can opener.) Melt a cup of chocolate for one minute (or per package directions) and stir. I made some with dark chocolate and others with semi sweet, than I used some white chocolate to drizzle.
Then just coat your spoons. I topped with sprinkled candy canes (sprinkle the candy cane over the bowl for an easy cleanup), marshmallows, sprinkles and melted chocolate drizzles. It's fun to come up with different combinations... some are prettier than others too. Place on waxed paper and refrigerate for 30 minutes or until the chocolate is hard. Then wrap the spoon top in cellophane wrap and tie with a ribbon. I really wanted to dip paint the spoon handles, but ran out of time!
I tied on a gift card made with cardstock and glued on cute little craft jewels that you can purchase from me here, or at a most local craft stores.

I put one candy cane in a ziplock bag and crushed it (a rolling pin is good, I just banged the hell out of it with a can opener.) Melt a cup of chocolate for one minute (or per package directions) and stir. I made some with dark chocolate and others with semi sweet, than I used some white chocolate to drizzle.
Then just coat your spoons. I topped with sprinkled candy canes (sprinkle the candy cane over the bowl for an easy cleanup), marshmallows, sprinkles and melted chocolate drizzles. It's fun to come up with different combinations... some are prettier than others too. Place on waxed paper and refrigerate for 30 minutes or until the chocolate is hard. Then wrap the spoon top in cellophane wrap and tie with a ribbon. I really wanted to dip paint the spoon handles, but ran out of time!
I tied on a gift card made with cardstock and glued on cute little craft jewels that you can purchase from me here, or at a most local craft stores.
Don't forget to check out our Christmas decorating home tour this year!
May your Christmas be merry and bright!
Monday, November 26, 2012
Sweet Treats: Perfect and Easy Pumpkin, Chocolate Chip and Blackberry Muffins Recipe
The EASIEST method is to mix 1 can of pumpkin with 1 box of spice cake mix and THAT IS IT!!!
If you only have yellow cake mix, (like I did), just spice it up. A mix of nutmeg, cinnamon, cloves, ginger and/or pumpkin pie spice will do the trick and THAT IS IT!!!!
If you want to up the yumminess factor, than go cray-cray with some add ins. My weapons of choice: Chocolate chips and blackberries. (Cranberries, walnuts, raisins, strawberries, mint or white chocolate chips, anything would be good). I mix in about 3 cups of chips, then after the mix is in the muffin tins, I cut the blackberries in half and dot them on the tops of the muffins. Then, bake at 350 degrees till toothpick inserted in center comes out clean and the muffins pull away from the sides. Easy, peasy and soOooOOoooOoooo delicious.
Subscribe to:
Posts (Atom)