Showing posts sorted by relevance for query mascara. Sort by date Show all posts

Friday, September 18, 2009

Smokin Hot Eyes


I feel like dressing up and getting pretty. Being a stay at home mom of two feels like being detached from the world in a sense. My boys think I'm a beauty queen and all, but they also love to play with my post pregnancy belly rolls too. So, there ya go. Raise your hand if ya know what I mean.

I get out to grocery shop... mail orders once or twice a week... take the dog to go poo downstairs... go to church... and random visits or meetings every couple of weeks and that's about it.

Date night is always fun, because I get to dress up a bit. Put on 2 coats of mascara... on the bottom lashes! (4 on top, couldn't have it any other way). But today, I feel like changing my rut.


I promised you lovelies a good make-up tutorial, and so today, the start of a weekend is the perfect time! But I do get a bit lazy at times, so I found a really good tutorial for that lustrous smokey eye here at Design Mom. Guess what though. I am going to do it Friday morning! I'm crazy! I'll be doing laundry and dishes and wearing sweatpants and a messy pony tail, and I'll be up in my elbows in diapers... but dang it my eyes will look haute. Smokin'. I will have nude lips, to compliment my smokey eyes perfectly. Nude I tell you. I vow to not chew on them at ALL tomorrow, no siree, no chapped things to tarnish my smokin' hot smokey eyes. Just a good, lightly foundation-ed and natural gloss covered pouty thing. (hopefully they don't look like runny black eyes by the time the hubs gets home).

So, here is the smokey eye tutorial by Allison of petit elefant
~ whose eye is above, NOT mine, I swear (click on images for larger view)
*for the white color on your brow bone, I recommend Cover Girl Champange... explanation below.


Smokey eye not working for you? How do you know, you haven't tried it yet! Well, if not, you can try the more subdued, more everyday look that I usually wear (minus the undereye liner). Full tutorial here at Makeup Geek . And even more, MUCH more tutorials over at Youtube. Just see a pic that draws you in and check it out.


*ps... this is my all time favorite eyeshadow of the world. Covergirl Champagne. It hides little stray brows you missed plucking, or red marks from obsessive overpluckers (like me). On lazy (most) days, I usually sweep a soft blend from lashline right up to the eyebrow, then I add a bit more to the lid and right beneath the arch of the eyebrow, even dabbing a bit around the corner of your eye and below the lashline closest to your nose. Then follow up with 2 coats of black mascara. It's soft, light wash of shimmer, natural but manicured. Try it out.


And here I am, all ready to go check the mail, do some dishes and make quesadillas for lunch. Woo!


Wednesday, March 3, 2010

Creating Heart Bokeh Using Picnik


In this post, I talked about bokeh, and it's beauty. There are many ways of acheiving the look, you can either create a mask for your lens to create it physically or use photoshop brushes. Well, regular point and shoot cameras like mine won't accept a lens nor work in that capacity, and I dont have photoshop, so I decided to create my own... for free.

I used Urban Pink's Palm tree bokeh style, in that it focused on a stream of light around the trees for the inspiration of this photo.


My husband took this beautiful picture on a lovely October day in 2009 from our 3rd floor balcony. We joked with our toddler how we lived in the trees because all of our windows were surrounded by leaves.

First, I uploaded this photo to Picnik. I cropped it, brightened the exposure a bit and that was it for prepping the photo.

Second, I went to "create", then "stickers". I choose the heart sticker under "basic shapes" for this photo. (Click on photos to zoom)


I made one heart in the desired opacity, size and color, then simply duplicated it about 25 times. You duplicate by right clicking on the image and chosing "duplicate".  After that, I duplicated another heart in a different color and kept going. I have a pink, orange, yellow, teal and white. I would probably go with less colors next time, but I wanted full impact since this is a tutorial. With a few hearts, I went back and made the opacity a little less and some a little stronger.

I now continued to spread my hearts around. Remember, they need to clump and overlap in places. I started with a central point and went out from their in thinning tangents for a natural distribution feel.

There isn't much more you can do to the bokeh hearts at this point, because they are only stickers. So any effects you do on the photo won't apply to them. So, save your photo under a working name and close this one out.

Now, you are going to reupload your photo. Notice now, the hearts are flattened and are officially part of the photo.
We now are going to work on making those hearts glow and softening their edges. I first went to "create", then "effects" and used a bit of "ortonish" to enhance the overall color of the picture and the hearts.


Then, I went to "soft focus" and put it on it's strongest setting. When you do this, it softens the whole photo, which is not what I want. So, I go to the tool box that appears and choose my brush size and strength. I take me tool (the circle) and simply erase where I don't want the softening. I erase it from the trees and on some of the hearts so that not all hearts are totally softened.

After that is complete. I save it and go on to "boost". This is what is going to add that glow! I adjust it and save.

After the glow, the softening and color is perfect! BUT, some of the defintion in those lovely clouds on the right is lost. So, I go over to "touch up" and choose my trusty "mascara" wand. I use this tool all the time to bring back definition. I just go over the clouds, the tree line and a few select hearts.

While still under the "touch up" tab, even though some hearts are softer, I would like to blur  some of the edges a tad more.  So I go to "air brush" make a small wand and air brush some of the heart lines.

Now, I go back to the "effects" tab, then to "vingette", and add a soft layer of black. It really adds more depth to the photo and brings the focus where I want it to go.


So, maybe I went a little overkill with the hearts, but this was just an excersize and my first time as I documented my process as I went.  I decided to play with sizes and lessen the cloud of hearts, remove the orange ones and make more clumpings.... and I love it!

I added a few faded white circles to the corners in the larger hearts for some depth. I also removed the "vingette" and the "boost" was bright and beautiful, but I added some "gritty" to the photo to add some character, lessen the brightness and make it more like a dream.


This is merely an example of how playing around with an image and pushing your imagination takes you places you never thought you could go. So, save your work and enjoy! Next time, try hexagons, circles, stars, different colors or all white or a lovely mix :) I would love to see what you do!!


BIG GIANT PS!!! If that above was too complicated, Picnik has a built in Bokeh stamp! It's hearts and they sit at an angle, You just apply it to your photo, adjust the size, hardness and strength and you can edit the hearts on your page. To find them, just upload your photo, go to "create", then "seasonal" and then "valentines". You can either erase them where you want them gone, or hit the "reverse" check box and paint them on where you like. Easy!

*Picnik is a free photo editing tool that you just upload your photos to their website, no need to download the program. I have the ugraded membership which allows me to use the premium features (like mascara), but most of what I did here can be used on the free membership.

Wednesday, June 15, 2011

Aquarius Girl Eye Make-up Tutorial

I tried a fun new eye color, and it's so easy anyone can do it. Most colorful eyes I see lately are usually way over the top for someone over the age of say, 17, or who isn't working in a salon. So I tried something a tad more subtle. This is the make-up I wore with my last 'thrifted librarian' outfit here.

If you have $, then I suggest Aquarius or Haight eyeshadow by Urban Decay. Awesome pigments (though not as good as MAC), and a nice, metallic shimmer. But I went with my cheap favorite Cover Girl shadows in aqua paradise, knock out pink and champagne. The 'fun' pigment colors only lasts a few hours before going dull, but still fun, right? (Except champagne, that pigment lasts all day.)


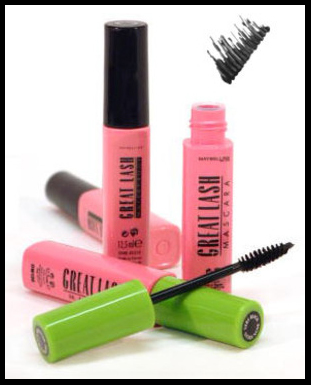
I used the lilac/pink on the middle of the eye line (both top and lower lid) and the crease, champagne under the brow and inner corner, and my favorite liquid liner, bourjois paris liquid liner clubbing in black, curled the lashes then applied Maybelline Great Lash mascara in blackest black. I decided to go ahead and have fun by adding a small little wing at the outer corners. Yes, I forgot to color in my eyebrows. My eyebrow tattoos have now totally faded, so I rely on coloring in my eyebrows for a finished look.


Yes, my eyes are foldy and wrinkly... get over it self, I'm a woman not a teenager. I prefer to think of them as being 'expressive'. And really, my 3 year old has the same folded overhang, so I guess it's just who I am as opposed to sagging. Yay!

Friday, July 25, 2008

Smooth Criminal


So, my 2 1/2 year old has done it again. He has been pretty good at not smearing make-up/yogurt/poop... all over the place on a regular basis, so when I caught him doing this to our baby, I had to grab the camera! (See HERE for his last mascara fun day.)

This little guy is so fast, I had to keep putting him across the room, and by the time I lifted my finger from the picture taking button, he was already on the lens. Not to mention my older one kept trying to steal the spotlight! It is amazing I got pictures as clear as these. Doesn't his big brother look so proud of his artwork!?

Also, I have to share this yummy recipe I got from a friend. It is so easy and delish. This is just awful, but I was going to include a cute chicken Etsy find, but then I got so sad about the poor little chickens, so I am including a YUMMY looking vegan chicken dish from pitseel (yes, she sales them, check out her shop), and this cute little pendant from julep115. Horror images from a secret taped of the "killing machine" that undercover PETA member did a while back at a Tyson factory has seeped into my mind. But I will not share THAT video, (though it would be the responsible thing to do!) Feel free to google it...


Chicken Azteca:

Turn on crock pot to a medium setting.
Dump a can of black beans, can of corn, 1 cup of salsa in a crock pot.
Put a bunch of cut of (about 1 1/2 - 2 inch size pieces) raw chicken on top.
Pour another 1/2 cup of salsa on top.
No need to stir, then cover.

Let sit for a couple of hours. Once the chicken is cooked through, take a small box of cream cheese (the fake low fat stuff works perfectly), cut it into cubes, and stir it into the crock pot. Once it melts (fairly quickly) your food is done.

Serve over rice, sprinkle with cheese... this is so good.

Also, I have to showcase some Twilight jewelry... but it isn't mine for once! Look at this lovely bracelet from More Everything, isn't it to "die for" (pun intended, vampire lovers)!! It says "I run with Vampires (or you can choose werewolves instead). But what is great, is for non Twilight peeps, she can also do a custom saying for you as well.

Monday, February 25, 2008

Already Behind

I love my kids! I love crafting!

Unfortunately, the two don't always go together... My 2 year old is the most adorable and sweetest tornado you will ever see. One second of listing, photo editing, crafting, cooking... and my head is turned... I turn back and see a little catastrophe. I had high hopes for creating today, and this is what I see:

Photobucket

This is the 4th tube of mascara I've had to replace (oh and we're on lipstick tube 8 as well). And yes... I do keep my things locked and up high, he's just a little Houdini. As a make-up artist though, I do have to say I'm impressed with how he managed to get that grunge look directly on the eye without flinching.

Wednesday, July 29, 2009

Editing Your Photos With Picnik


holga-ish on my dragonfly necklace

Whether you have an online business and you would like to make your photos really pop, or you want to enhance your blog photos, or you enjoy photography as a hobby, or you just want to edit your family photos to make you look ultra hot, then you would love to try Picnik. It is a free program that is quite user friendly.


infrared film with yellow matte a signature and logo

Though only the basic edits are free, you still get some neat choices. I edited the same exact photo in this post using only the free tools for examples. Now, for basic editing, I really love Picassa 3 which is totally free does have lots of neat features and easy to use, but Picnik has lots of other features for more "play". You can really acheive the look of vintage photos, holga photography, and the style of film noir and a play on exposure that is just beautiful. Of course, this program is probably a nightmare to the true photographer that has studied and learned their own tricks and uses the lens and darkroom to capture these effects, but this is just for fun!


boost, vingette, 1960's round corners and a touch of film grain

Of course on the free version, you have limited uploads and for more advanced tools like "gritty" (so neat!), and photo editing for people, like eye and teeth whitening, sunless tanning, eye color brightening, red eye reduction, wrinkle softening, airbrushing, mascara highlighter!!, shine reducer... (wish I could get these and a belly roll reducer and a make dinner and do dishes tool in real life!). All of these tools are in the premium package that you have to sign up and pay for, but you can at least try them out (one at a time though) to see if you would like the investment.


touch of black and white, cross process and focal softening

I hope you have fun experimenting with your images. You can give your shop or blog an entire overhaul without ever having to retake photos. Unless your photos are very dark, overexposed, blurry or poorly staged, most can be saved with an artful flair with Picnik.


boost, filmgrain, vignette and orton-ish

Edited to add~
as you can see through my photos, the colors have changed drastically. For fun, artful purposes, this is totally acceptable and encouraged! But remember, if you are selling online you need to remember to keep the colors as close as possible to the real thing so that your buyers won't be mislead.

Tuesday, December 15, 2009

I Heart Faces


This is the original, unedited photo.

I Heart Faces is a site dedicated to photography of people and editing styles. While I am not a photographer, nor a trained editor by any means, I do love playing around with my simple little program, Picnik on photos. (click on photos to enlarge)


edit 1


First, I cropped the photo just a bit taking out the negative space on the left side. I minimized a few little baby blemish spots and softened those areas. Then, I whitened the eyes just a bit and added a hint of peach blush to the apples of the cheeks. I used a 'gritty' filter, then boosted the color a bit and used the lomo filter.


edit 2


For the second edit, I cropped the photo a bit, added blue tint to lightened eyes, brightened the whites and emphasized the lash and lid lines and added peach blush to the cheeks. Then, I filtered the photo with a little boost of orton-ish and a bit of  a cross process.


edit 3

For the third edit, I added more exposure and color contrast. I very lightly airbrushed the chapped skin and added just a hint of peach blush.I whitened the eyes a touch and went over the lashes, lid lines, smile marks and other facial features with "mascara" to bring out any features faded in the exposure. I used a tiny amount of lomo-ish filter and a soft gray matte vignette. Very soft and bright.


edit 4

I used edit 3 for the base. I added a black and white filter, but took it just to the point where the slightest color is left. A hint is seen in his lips, cheeks and blue shirt. I then added a softened black frame and a focal blur, keeping the face in tact and softening out the rest of the photo.


I wanted to keep the baby real and sweet looking, with a vintage, dreamy feel, and I think I captured that. Which of the 4 edits is your favorite? Feel free to check out the links of what everyone else has done to this adorable photo!

Wednesday, October 29, 2008

Family Time: Halloween Craft and Treat Ideas


We had a fun weekend taking the kids to the Hall pumpkin patch in Grapevine and a (tame) haunted hay ride through a corn maze (excellent kettle corn I might add). Isaac was a little scared, we covered his face a lot and instead of using the word "monster" since he is obsessed with them after all, we told him they were "silly people" and pretending to be scary. He didn't like that, but accepted it and has so far, not had any damage (aside from the first night, muttering about "silly people").


Isaac mascara'd up Caleb (again) and I had to take a pic, because really, finding a camera and getting a good shot is the best way to calm down and have a laugh. Time out definately comes later though. Also, I thought I would share a fun toddler idea. Isaac LOVES taking pictures. He poses his toy cars next to the dog, or whatever and just snaps away. He especially loves taking pictures of feet and his baby brother. I just thought that was fun to share, and a good family idea. Maybe, you can get items together, and stage a little photo shoot for your little ones. Try doing this before holiday pictures are taken, so they can see what it is like being on the other side of the camera for once. Maybe it will teach them a fun lesson, maybe not, either way it can be fun, even if most of the photos are blurry.


I have been listing new jewelry in my shop, but I still have tons more to go and just lack the motivation to do it! I have some new pieces in the works, but I sometimes wonder if putting it off to the side would be best until I get more organized. Then, I realize, in this cramped up little home, that's NEVER going to happen!


Well, I DO have a Halloween party treat tip. It is an EXCELLENT one, I mean, truly amazing, but I do not have photos of it, so I spent an embarrasingly long time on this corny paint illustrastion :( We did this for a party one year and it was too cute, so please TRY and visualize with me people!!!


1. Get a pumpkin and clean the dirt off.
2. Paint a scary or silly face on one side of the pumpkin (or carve it, your choice).
3. Make kabobs. I used pineapple chunks, cherries, cheese chunks, grapes, little rolled turky meat, strawberrie... for an appetizer, but you can make a steak/shrimp/bell pepper/mushroom/pineapple grilled kabob instead if you want to make it a meal.
4. Stick kabobs into the top of pumpkin.

When you are done, the pumpkin looks like it has crazy hair! It makes a yummy and easy treat and an excellent display for your food table.

One more easy PUNCH tip:

1. Make a fruit punch in a funky color, red, purple, green... add your sprite and a coupel scoops of sherbert if you want. But the actual tip is not the recipe here.

Take a plastic/latex POWDER free glove, rinse it out well and fill it with water. tie the end like a water ballon. Freeze your glove. Then, when it is nice and frozen, cut off the glove and add your floating, dismembered hand to your punch. There, wasn't that simple!?

You could also make a little topiary with either fall flowers, OR use food! Use toothpics in the styrofoam and arrange grapes, strawberries, large marshmallows, cheese cubes and other fun things to make your desert topiary. The Kim Vallee blog has a little tutorial.


OR... Look at this excellent CANDY topiary, from of course, Martha Stewart, go there for the tutorial! Can you tell I like topiaries? Be prepared to see some amazing Christmas ones soon!


And one last yummy thing. I love Etsy, I love their "blog" the Storque. I LOVE their how-tos, and I especially love this one. How to make bleeding VAMPIRE cupcakes! It is perfect for Halloween OR for Twilight parties, yay!! The link has all the instructions as well as a nifty little video. Now make some and take a bite.

Related Posts with Thumbnails