

The Shabby Nest inspired me to post this project I did the other day for her Frugal Friday Linky Party.
I wanted a new look for my lamp, but I really love the shade. Every other lamp covering tutorial required sewing a slipcover (I don't sew), or required desecrating the shade with copious amounts of glue. I love glue, but like I said, I wanted a cheap and easy way to update my shade without altering it.
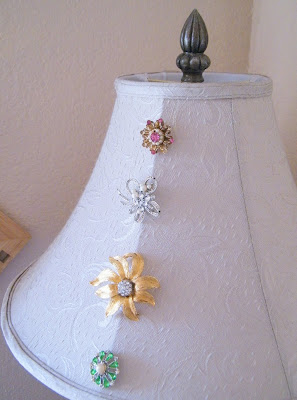
Above is a quick before shot from my Spring Decorating post

I got a yard of fabric and used iron on hem tape on the very bottom (ignore the top). To know how much material you need, measure the bottom circumference of the lampshade. You will need the same amount, maybe an inch or so more just to be safe.

I flipped over my lampshade and used small pins to attach the hem-taped part to the rim of the lamp. NOTE- if you are wanting to use fringe, sandwich it between the fabric and lampshade during this part.

Next, I pulled up the fabric and cut it a couple of inches above the top of the lamp. I just pulled and softly pleated the fabric, folded it over the edge of the top of the lamp and pinned away until all was in place.

Ta da! Now, I have a lovely damask shade with a bold pattern and soft pleats that only cost me a few dollars.

I took a .50 cent garage sale mirror, splashed on a fresh coat a paint and gave my new lamp of reflection window. I take a matching fabric (that I found for sale in the remnants section at Joanns), and tape it to the inside windows of my television cabinet to tie my new fabric in the room. Photos of that coming soon!

While on my hunt for lampshade ideas, I happened upon this gorgeous shade project from Alchemy Fine Living. The creator has an Etsy shop, BrickBasement. Bedazzle your shade frame with fabric and ribbon shards, photos and other baubles for a truly smashing look.

Now, because I want to infuse more art into my home, I am going to print off a couple of *free* (personal use only) prints from A Print A Day! Go check Yasmine's site out, tons of cute stuff.

ps. ways to keep your toddler entertained while you do this quick project:

9 comments:
Gorgeous work! LOVE the final photo, so cute! LOL!!
love the lampshade.. but better yet I love the body art on your son!!
have a great week!
hugs
vivian
The lampshade "re-do" is beautiful. I liked the before pic with the pins on it too. The new version would go nicely in my family room!
xo
jeanne
Cute lamp shade! Love the fabric!
That's an almost perfect project -- cheap, easy and impressive looking results.
:)
I just found your cute blog! What a cutie you have ..I have 3 little grandsons..and I have a photo of the oldest(3) looking very much like yours!
Good golly, Molly! The lampshade made of ribbon and tulle is way cool. I'll have to try that in Charlie's room.
What a lovely finished project, love the choice of fabric used :)
Have a lovely weekend!
I LOVE the lampshade!! Great job!
Post a Comment