Monday, April 20, 2009

Tender and Sweet, Movie and Popcorn Treats!


Last night, as is our routine as of late, we put the kids down and watch a Netflix instant streamed movie on our Xbox 360. Lately, we have been focusing on watching independant and foreign films in order to become more distinguished and cultured (ha!) but on other nights, we watch The Office over and over and over again. (how many times is too much to watch a rerun and lose our classiness?) Do you have any suggestions for movies for us to watch? (no rated R, nudy, cussy, too sexy ones tho!)


So far we have watched Man on Wire (very interesting indeed, watch out a random nude scene that comes from nowhere) about a passionate Frenchman lunatic (imo) who crosses the New York Twin Towers in 1974 on a tight rope. The journey is intense and gripping, a very well done documentary.


vintage film reel from sushipotparts


Confessions of a SuperHero, amazing documentary about the SuperHeros who "work on tips" in Hollywood to take photos with tourists. They pretty much all need a little bit of (okay a lot) of mental therapy. Well, Hulk is the most normal, actually. Just watch it, you will be amazed.


popcorn stamp by Cupcake Tree

primer movie independant sundance film

Primer, is a film about a team of guys who are obsessed with building a time machine. It is interesting, quirky, and even hard to follow in some parts even for people like me, who tends to follow brainy movies quite well. This review pretty much sums it up completely, I actually really liked this movie though!


popcorn soap by LoveLee Soaps


But, our latest movie was Cj7. I loved, no, LOVED this movie. My husband loved it. At various points of the movie we were laughing, crying, screwing up our eyebrows saying "wth?", being totally humbled (I even felt guilty at times for being so concerned with slipcovers and new drapes and such), and at the very end... well, you should just watch it. You will want this space alien toy dog to be yours forever too.


Well, really, my post wouldn't be complete without some sort of decorating or craftiness, so here are two gems. These would be perfect for family movie night, a craft, treat and time together watching a fun and inspiring film. Popcorn bag idea from Gretchen of the Examiner.


You’ll need one sheet of 8 1/2” x 11” paper for each bag. Lay the paper in a horizontal position and draw dotted vertical lines 2 1/2”, 3 and 3 1/2” from each side with a pencil and ruler. Draw horizontal lines 1/2” from the top and bottom.

Draw angled lines down from the lower horizontal line and middle vertical lines to the bottom of the page. Use the template shown as a guide. Cut away the sides leaving a flap.

Trim the horizontal top of the paper with pinking shears or other decorative scissors.


Paint stripes down the center of the bag with a thin paintbrush and craft paint or wide colored markers. When the paint is dry, write “Fresh Popcorn” on the bag in black and add a few simple stars for cinematic appeal.

Fold in accordion style on the dotted vertical lines. Burnish the creases with the back of a spoon. Adhere the folds in back with a glue stick. Fold and burnish the bottom flap and glue. Your popcorn bag is ready to be filled with a hot buttery snack!

ps, search Etsy for popcorn! All kinds of neat treats, like curry popcorn to popcorn crafts are there!

And last but not least, a popcorn ball recipe!


INGREDIENTS (Nutrition- ha!!)
3/4 cup light corn syrup
1/4 cup margarine
2 teaspoons cold water
2 5/8 cups confectioners' sugar
1 cup marshmallows
5 quarts plain popped popcorn

DIRECTIONS
In a saucepan over medium heat, combine the corn syrup, margarine, cold water, confectioners' sugar and marshmallows. Heat and stir until the mixture comes to a boil. Carefully combine the hot mixture with the popcorn, coating each kernel.
Grease hands with vegetable shortening and quickly shape the coated popcorn into balls before it cools. Wrap with cellophane or plastic wrap and store at room temperature. Yeilds, 20 popcorn balls

Wednesday, April 15, 2009

Mermaid Fairy Princess feasts on Scones


I made Scones. And a butterfly princess mermaid, but that later. I, a woman who cannot bake for anything made scones. As you can tell by my photos... I did scorch the tops just a teeny tiny bit when I broiled them for the sugar glaze part, but it was my VERY first time to use the broiler... .and I will be 28 in a week, so I can cope.


Really though, what I am saying is, if I can do it... then ANYONE can! It was fast, easy, sticky, gooey, and YUMMY! We are craving them. I used the Raspberry and Chocolate Chip recipe, but I used Blackberries instead of the raspberries (please use Blackberries!) Best decision I ever made. Besides getting baptized, and married and having kids and starting my jewelry biz, and my blog... Joy of Baking is practically the official king of scones in the world, imo.


Oh, I also am doing the lovely Gypsy Mermaid's Pink and Green Swap. I have decoupaged a lot before, but I don't have any fancy programs and don't know a THING about resizing photos so that they will match up. SOOO I did it in Microsoft PowerPoint (that computer lit class in college WAS good for something!)

I basically just got a blank page, and inserted pictures. I was able to resize the photos and layer them on top of each other so I knew that when I cut the wings and such out, it would be the same size as the girl and such. So, that is how I did it and how I will continue to do it until I find a better way.


How do you like my box with all of the goodies? I hope my swap partner likes it! When my 3 yr old saw it, he exclaimed, "A Mermaid!" "A Butterfly" "A Princess!" "A Mommy!" Yes, he is my little Superhero sweetie!

The adorable little girl is from Spark Your Imagination, the wings from Adaae on Deviant Art and the tail/tiara I used a stock photo of sequins fabric on sale. I made sure all of them are able to use of course! I literally spent HOURS looking for excellent images, here is what I found! On flickr, Finsbry has tons and tons of images of vintage books, epherma posters... Trials and Errors has tons of photos of the Depression, child labor, Ziegfeld follies (some nudes, BEWARE- put your safe settings on!)...


The Enchanted Lady has AMAZING paper doll templates (including wings and a mermaid tail, and lovely project ideas!) And Liana, of Liana's Paper Dolls, draws paper dolls and amazing outfits that you can use as well! These are perfect for beginner or experienced decoupagers/altered artist/crafty types. Have fun! And be sure to credit those images/get permission if you need to before using!

P.S... I am considering hosting a crafty swap now. Would anyone be interested? If so, what would you be interested in creating/receiving?


Saturday, April 11, 2009

Origins and the Spirit of Easter


Wild Easter Lily by KHall65890

I love Easter! I love cuddly chics, bunnies, lambs, baskets, bonnets, decor, pastels, lace, flowers, Cadbury bunny commercials... but what I truly, deeply love, is the True meaning of Easter.


I have a firm foundation and testimony in Jesus Christ, our Savior and his love and sacrifice for us. It is easy to forget this at times, but when we feel alone and in need, remembering Him and how He remembers us can help us. Let us always remember Him, not just when we need Him in times of trouble, but always! This video is a beautiful message about our Savior's atonement, and is my Easter message to you. You can read the full talk, by Apostle, Elder Jeffrey R. Holland, entitled "None Were With Him", in which he describes the Savior’s solitary journey to overcome sin and death and testifies of the resulting blessings to all mankind.


Tulips & Eggs in a clear glass bowl and more ideas from The Inspired Room

In my family, our Easter tradition was laying out carrots and milk for the Easter bunny. On Easter morning, we awoke to a nibbled carrot stick, an empty cup of milk and milky paw prints on the table and the floor. Evidence!! Question. When you were little, did you envision the Easter Bunny to be like an actual looking bunny, or some huge rabbit like the kind in bunny costumes?


"A Little History: The origins of celebrating Easter seem to begin early in the third century with a movable feast honoring Christ’s resurrection. Early Christians may have eased cultural differences and religious conversions by relating their feast of Christ’s “renewal” or resurrection with Anglo-Saxon’s pagan spring celebrations involving Eostre, the goddess of spring and renewal, who was depicted at times with a hare or eggs. The Germans, much later in the 1500s, introduced the Easter Bunny or the “Oschter Haws” who would lay colored eggs in hidden caps and bonnets of boys and girls on Easter morning (boys made nests in their caps/girls made nests in their bonnest for the Bunny to lay the eggs).

By the time this tradition was brought to the United States, it was popular to leave out baskets for bunny and egg shaped sweets. Easter is now celebrated religiously and/or secularly throughout the world. As Christians, our family celebrates the Resurrection during Easter and we also are lucky enough to have the Easter Bunny hop by to celebrate it with us.


The following is a tradition we have begun with our family to help teach the meaning of the holiday: a few weeks before Easter we grow wheatgrass. As the wheatgrass grows, each day we review a little bit of the last days of Christ’s life and his resurrection. The definition of resurrection is “the act of rising from the dead or returning to life”. Since Easter is a time to celebrate the resurrection and a renewal of life, early spring is a perfect time to teach your children about birth, growth, the resurrection and life. While the grass is growing , we leave the grass out for the Easter bunny to leave treats on as an early reward for learning of and knowing the meaning of Easter. The above photo is our wheatgrass from this year!" ~segment by No Fuss Fabulous (click link for directions on growing wheatgrass and ideas of what to do with it!)


Another great idea to do with your children, is this paper Easter lily. You simply trace your child's hand on a piece of paper, cut it out, roll it up, roll the fingers down and attach it to pipe cleaners to make a paper flower. I think, you can teach how the Lord had a hand in creating so many wonderful things for us, like flowers and He also gave His life for us.

Then, after each family member has created their own handprint flower, put it in a vase together and show the children how the family is special and created by God, and each member of the family is here to love and help each other. They will see how beautiful and strengthening it is to put a single flower together with more to make the family bouquet. Full instructions/photos at Artists Helping Children.

Happy Easter!

Sunday, April 5, 2009

Egg Swap and Words to Live By

yellow shabby chic decorated eater eggs

Today, everyone who participated in Viv's Out On A Whim Egg Hunt will be revealing both the eggs they made and received, so we can check out each other's blogs and "hunt" for those who made/received our eggs!

The yellow cuties shown above are the eggs I made (I added a small hint of glitter to the flower's centers after the photo).

Here are the eggs I received!


A lovely aqua blue painted egg with red polka dots, rick rack trim and a lace and rose top. So perfect and gorgeous! And a cutout blue egg with glass glitter and a lovely scene inside of a sweet little duck and the cutest yellow flower buds inside. Stop the world, I am in love with an egg. I know have the most beautiful shelf ever (complete with roses my husband picked from his mom's rose bush)! If you prefer simple and sweet, this is what my Spring mantle looked like BEFORE!

easter egg spring decor decorating craft cottage shabby chic mantle

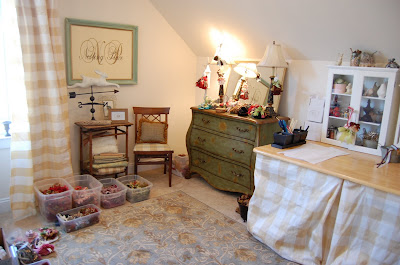
How did Viv know that I was redecorating for Spring and adding blues to my pink/green room (it's no secret I have been aching to change the color theme for a while)? (making a storebought slipcover work and pillow redo room makeover post coming soon... I can't wait!)

robin's egg jewelry vintage lace blue red spring fashion necklace

I also made some cute robin's egg necklaces in the shop, this has red accents, and the other has ivory accents. A couple more will be listed within the next couple of days. Perfect for Spring!


He Lives by Simon Dewey

Today and yesterday is The 179th Annual General Conference of the Church of Jesus Christ of Latter Day Saints in Salt Lake City. The conference will feature inspirational messages from members of the First Presidency, the Quorum of the Twelve Apostles, and other General Authorities and general officers of the Church. You can watch or listen to the conference on the Internet. And next month, a dvd and magazine will be available of the conference as well. For information on worldwide broadcast times and options, see the broadcast schedule. Feel free to tune in!

I missed yesterday's conference due to a funeral for my wonderful sister in law's, sister. She was only 33 and died of cancer. It was a sad occasion, since she left 3 young children, but happy that she is no longer in pain and that she is reunited with friends and family. We Mormons belief that death is only another step in life, as we believe we can be sealed for time and all eternity as a family unit through Heavenly Father's plan of happiness.


I will probably post later about some of my favorite talk's from the conference. Even for those who don't believe in God or Jesus Christ or share our same beliefs, there is always an inspirational message that is uplifting. I especially love this one from last year, from President Dieter F. Uchtdorf: The desire to create is one of the deepest yearnings of the human soul. You dont need money, position, or influence in order to create something of substance or beauty His full talk, entitled Happiness, Your Heritage, can be read HERE. I love this one!

Wednesday, April 1, 2009

Wrapped in Warmth

marie antionette spring fashion vintage inspired pink green brass necklace jeweledambrosia jeweled ambrosi
A Royal Affair Necklace by Jeweled Ambrosia

I was up until 3 am listing/photographing/designing new jewelry last night, so my post today will mostly be a compilation of other wonderful posts and thoughts, since my creative side is pretty tired right now!

Now, I read The Nester's blog and love it to pieces. Earlier in the week, she had a great post about weighing the pros and cons of your craft, and if it is worth it or not. She really does a great job at pinpointing a lot of important factors. I am going to elaborate on the financing part. (doesn't she have a lovely craft room?)

craft sewing room cottage shabby chic

I also started my business without going into debt. As a matter of fact, we don't even have a credit card. I know! This is how I started my jewelry business. I put random furniture, baby clothes, toys, maternity clothes, electronics... on Ebay, Craigslist and second hand shops like Kid to Kid. If I lived in a house, I would of had a garage sale (or three). I cut some friends hair. I stopped making frivolous purchases (wasn't doing that much anyways.) I made about $400 and I used that to buy my supplies. Also, I traded with some supply sellers to get a little bit of items as well to experiment with.

I felt really guilty about using that money, not knowing what would happen, but then I had to remember that I was decluttering the house, and that is always a good thing! Now, I only purchase supplies after I have a sell, so my Paypal account is my ultimate decision maker for me.


Alicia Poulsen over at Posie Gets Cozy has nailed one of my favorite Indian food recipes. Chicken Tikka Masala and naan. Now, she shares lovely photos and the recipe, oh yay! So THIS POST serves to share the nummy yumminess with you, but also to bookmark it for me!

esoule lobster with flower fine art photograph
Lobster and Flower Fine Art Photograph by esoule

One last thing I needed to say. I think, we have a tendency to be quite hard on ourselves. If you are anything like me, you expect a certain level of tasks to always be completed and in good order. Some days, I will out do myself, all the laundry, all the dishes, all the dusting/vacuuming, packaging and shipping, blogging... but then I am too deflated to take care of what matters most... My sanity, my spirituality and my family. I absolutely love this video (talk by Elder Jeffery R. Holland, more short inspirational videos like this HERE. )The message really brings to light what is the most important in this life. Perfect reminder on demonstrating love for friends and family. Watch it with your family. Hold hands. Make brownies. Play together. Don't yell. Teach each other. Pick flowers. Fold laundry together. Be nice.


I think that if you start your day with a prayer for thanks, comfort, and a plea for help, search your scriptures, and meditate on your important tasks first, then the others will soon follow in line.

Also, it is important to pace yourself. Not all can be accomplished in one day. Set realistic goals. If you are a list maker like me, a list can accomplish two things.

1. Helps you to realize all that needs to be done.
2. Makes you feel like there is no way you can do all that needs to be done.

So, take your list and break it down. Put the important things first. Tackle each thing one by one, careful to rest and spend time with your family or self during the breaks. Mark them off as you go as well, and treat yourself for accomplishing those tasks.


vintage alarm clock from 26 Olive Street

If you are an internet junkie like me (my blog and business IS on here after all)... set a kitchen timer and when that thing rings, turn off the computer, and do your next task. Sometimes, that loud, obnoxious buzzing sound is the only thing that can pull you out of the abyss of the internet!

Treat your happy home and family like the lovely little cottage dwellers that you can be.


Dwellings by Petite House

Lastly, I want to share with you this absolutely amazing tutorial by Cathe Holden of Just Something I Made. It is an iron on transfer leather wallet, complete with step by step instructions and images, click HERE.


Peace and warm thoughts of banana bread to you all!

Monday, March 30, 2009

Adding Color With Paint

shabby chic vintage jeweled ivory creme candlestick holder blue creamer

I have whined about the color palatte of my home in the past, but now I am doing something about it. With paint. Now, if you are wanting to *try* a new color, but don't have the budget to redecorate or don't want to sew new throw pillow covers, paint a couple of pieces to see how it looks. If you hate it, then paint over it. Go to Goodwill and find some cheap knick knack to experiment with. Shop your house for a mirror frame, picture frame, or some other doodley whop. Today, I am doing my Friend's peephole frame, and a pretty vintage brass candlestick.

Also, I have joined Life in Grace's linky party for painted wood projects. You absolutely MUST see her kitchen. Oh my goodness.


Truly, this is how it goes in my home.

I find a bottle of paint I like, I pull it out with a paint brush and a piece of sandpaper. Then, I quite literally wander around the house pulling stuff out of hiding, from shelves, walls...

Then, I dust it off, sand it a little and start to paint.

But, Lisa, shouldn't you prime? *Blink blink* Probably. Considering that I wil most likely repaint them the next time I want to change color, I really don't bother with that.


But Lisa, shouldn't you use paint designed for metal finishes? *Blink blink* Probably. But I really don't do anything except dust them. If you will use pieces for their actual usage, then by all means, sand better, prime, use the right paint, seal with a sealer, blah blah blah... but I really don't mind if the paint chips. Actually, I enjoy it. (HERE is a good post on painting metal)

Enough talking. Start painting. This is a technique that I use and have invented in my own mind, however, I am sure many many others use it too, but I gave it a name, in all caps. I call it REVERSE DISTRESSING. This is great for when you have an item where you love the color, but it is too bright, so you want to tone it down. (like white washing, but without the water).

Usually, to correctly distress, you paint the underneath color FIRST, the top color next and then sand through so the underneath color pops up through the layer of paint. If you like doing this, you will like this tip. To protect your underneath layer from sanding (so you don't sand too hard to the wood in certain areas) rub a candle on those edges. When you sand over the candle wax, it will reveal the paint you wish to expose instead of going to deep into the wood.

BUT. Forget the rules of distress painting. I switched it up. I paint everything the main top color FIRST. I usually do ivory. Or black. But this year ivory. I have been using Apple Barrel 20405 Antique White acrylic paint and we are getting married soon b/c I love it that much. This technique I will reveal works perfectly for pieces that you can't sand down to expose the underneath layer. Like my brass candlestick. The blue paint I am using is FolkArt 713 Coastal Blue acrylic paint.

SO. Once your piece is ready to paint (cleaned/sanded/primed), paint it your main color first. Now, take your accent color and paint just the pieces you want to highlight with a subtle burst of color, and let it dry, like so:


Now, it is time to DRY BRUSH. This is not my invention. But it works like a charm. You take a mangly, feathery, stragely haired brush for this. A blunt, well kept brush doesn't feather as well. Dip your brush in your main color paint (so ivory in my case), BLOT THE PAINT OFF THE BRUSH and very lightly blend in those bright strips of color until they look like they are being lightly exposed underneath.


You notice I only painted those stripes blue, but afterwards I dry brushed a mix of blue/ivory on other parts of the candlestick holder for a nice subtle finish. On the frame, I dry brushed the ivory on and focused on the edges of the wood. When distressing with paint, it is the same idea as sanding distressing. Focus on highlights, edges and raised surfaces, the areas that are most likely to be scratched and dinged over time.

ONE LAYER OF BLENDING:


FINAL BLENDING (many layers):


I just keep on dry brushing until I am happy. I love how this technique works every time. It leaves a nice texture as well. On my candle stick, I did not sand at all, but on my peep hole Friends frame, I did sand just a tad to show some wood.

BEFORE SANDING:


AFTER SANDING:


It is easy and simple. Once you are done, embellish the pieces. I added lace and a rhinestone brooch to my candlestick, now available for purchase HERE! It would make a lovely vase (for silk or milinery flowers of course). Now, go find something to paint and introduce a new color to your room!

Wednesday, March 25, 2009

Apocalyptic Romance

urban rhinestone vintagee brooch greay gray fabric textil cuff accessories

I found an amazing shrug tutorial last night and got inspired. Well, the shirt I was using didn't fare so well b/c of the sleeves, but I decided to salvage some of the remnants.

The neckline hem turned into this gorgeous and comfortable cuff. I hand embroidered chocolate and white twisted bakers twine and fastened it with a glorious shabby vintage rhinestone brooch. I love how it can be worn as a cuff, or as a neckwrap. If you like this unique creation, you can purchase it HERE. What other wonders can I do with this piece of fabric? Hmmm, we shall see. Oh yes, we shall.

diy easy romantic shrug tshirt how to tutorial craft

Now, the amazing tutorial I found is for a tshirt shrug. It is so romantic and easy, I thought I would share. Summer will be here soon, so this lightweight and romantic shrug will be perfect to cover up over a swimsuit or tank top, and you can make textile jewlery from the remnants too! It is so incredibly easy, even for non-sewers (like me). Find it HERE.

If only this skirt was still available from kaylim, it would be perfect with a shrug and textile accessories!

olive military pleated romantic diy skirt kaylim

One day, I am going to get something from her, I absolutely love her reconstructed sweatshirt emsembles.

kaylim grey gray sweatshirt diy romantic

This post wouldn't be complete without a pair of gorgeous earrings. Aisha, of Treasure Box Jewelry is so inventive and has some lovely pieces to choose from, she is also a really sweet person and that makes her so special! Her Dewdrop Dangles are one of my favorite pair of earrings in all of Etsy-land. I love the organic and urban feel of this design. Show this new designer some love and check out her shop!

Related Posts with Thumbnails