Monday, March 30, 2009

Adding Color With Paint

shabby chic vintage jeweled ivory creme candlestick holder blue creamer

I have whined about the color palatte of my home in the past, but now I am doing something about it. With paint. Now, if you are wanting to *try* a new color, but don't have the budget to redecorate or don't want to sew new throw pillow covers, paint a couple of pieces to see how it looks. If you hate it, then paint over it. Go to Goodwill and find some cheap knick knack to experiment with. Shop your house for a mirror frame, picture frame, or some other doodley whop. Today, I am doing my Friend's peephole frame, and a pretty vintage brass candlestick.

Also, I have joined Life in Grace's linky party for painted wood projects. You absolutely MUST see her kitchen. Oh my goodness.


Truly, this is how it goes in my home.

I find a bottle of paint I like, I pull it out with a paint brush and a piece of sandpaper. Then, I quite literally wander around the house pulling stuff out of hiding, from shelves, walls...

Then, I dust it off, sand it a little and start to paint.

But, Lisa, shouldn't you prime? *Blink blink* Probably. Considering that I wil most likely repaint them the next time I want to change color, I really don't bother with that.


But Lisa, shouldn't you use paint designed for metal finishes? *Blink blink* Probably. But I really don't do anything except dust them. If you will use pieces for their actual usage, then by all means, sand better, prime, use the right paint, seal with a sealer, blah blah blah... but I really don't mind if the paint chips. Actually, I enjoy it. (HERE is a good post on painting metal)

Enough talking. Start painting. This is a technique that I use and have invented in my own mind, however, I am sure many many others use it too, but I gave it a name, in all caps. I call it REVERSE DISTRESSING. This is great for when you have an item where you love the color, but it is too bright, so you want to tone it down. (like white washing, but without the water).

Usually, to correctly distress, you paint the underneath color FIRST, the top color next and then sand through so the underneath color pops up through the layer of paint. If you like doing this, you will like this tip. To protect your underneath layer from sanding (so you don't sand too hard to the wood in certain areas) rub a candle on those edges. When you sand over the candle wax, it will reveal the paint you wish to expose instead of going to deep into the wood.

BUT. Forget the rules of distress painting. I switched it up. I paint everything the main top color FIRST. I usually do ivory. Or black. But this year ivory. I have been using Apple Barrel 20405 Antique White acrylic paint and we are getting married soon b/c I love it that much. This technique I will reveal works perfectly for pieces that you can't sand down to expose the underneath layer. Like my brass candlestick. The blue paint I am using is FolkArt 713 Coastal Blue acrylic paint.

SO. Once your piece is ready to paint (cleaned/sanded/primed), paint it your main color first. Now, take your accent color and paint just the pieces you want to highlight with a subtle burst of color, and let it dry, like so:


Now, it is time to DRY BRUSH. This is not my invention. But it works like a charm. You take a mangly, feathery, stragely haired brush for this. A blunt, well kept brush doesn't feather as well. Dip your brush in your main color paint (so ivory in my case), BLOT THE PAINT OFF THE BRUSH and very lightly blend in those bright strips of color until they look like they are being lightly exposed underneath.


You notice I only painted those stripes blue, but afterwards I dry brushed a mix of blue/ivory on other parts of the candlestick holder for a nice subtle finish. On the frame, I dry brushed the ivory on and focused on the edges of the wood. When distressing with paint, it is the same idea as sanding distressing. Focus on highlights, edges and raised surfaces, the areas that are most likely to be scratched and dinged over time.

ONE LAYER OF BLENDING:


FINAL BLENDING (many layers):


I just keep on dry brushing until I am happy. I love how this technique works every time. It leaves a nice texture as well. On my candle stick, I did not sand at all, but on my peep hole Friends frame, I did sand just a tad to show some wood.

BEFORE SANDING:


AFTER SANDING:


It is easy and simple. Once you are done, embellish the pieces. I added lace and a rhinestone brooch to my candlestick, now available for purchase HERE! It would make a lovely vase (for silk or milinery flowers of course). Now, go find something to paint and introduce a new color to your room!

Wednesday, March 25, 2009

Apocalyptic Romance

urban rhinestone vintagee brooch greay gray fabric textil cuff accessories

I found an amazing shrug tutorial last night and got inspired. Well, the shirt I was using didn't fare so well b/c of the sleeves, but I decided to salvage some of the remnants.

The neckline hem turned into this gorgeous and comfortable cuff. I hand embroidered chocolate and white twisted bakers twine and fastened it with a glorious shabby vintage rhinestone brooch. I love how it can be worn as a cuff, or as a neckwrap. If you like this unique creation, you can purchase it HERE. What other wonders can I do with this piece of fabric? Hmmm, we shall see. Oh yes, we shall.

diy easy romantic shrug tshirt how to tutorial craft

Now, the amazing tutorial I found is for a tshirt shrug. It is so romantic and easy, I thought I would share. Summer will be here soon, so this lightweight and romantic shrug will be perfect to cover up over a swimsuit or tank top, and you can make textile jewlery from the remnants too! It is so incredibly easy, even for non-sewers (like me). Find it HERE.

If only this skirt was still available from kaylim, it would be perfect with a shrug and textile accessories!

olive military pleated romantic diy skirt kaylim

One day, I am going to get something from her, I absolutely love her reconstructed sweatshirt emsembles.

kaylim grey gray sweatshirt diy romantic

This post wouldn't be complete without a pair of gorgeous earrings. Aisha, of Treasure Box Jewelry is so inventive and has some lovely pieces to choose from, she is also a really sweet person and that makes her so special! Her Dewdrop Dangles are one of my favorite pair of earrings in all of Etsy-land. I love the organic and urban feel of this design. Show this new designer some love and check out her shop!

Sunday, March 22, 2009

Faith

salt lake city lads mormon temple
Salt Lake City Temple

As some of you may or may not know, the HBO show Big Love has aired an episode featuring sacred religious ceremonies in the temple that we keep very sacred and dear to us. The temple is a place where we strive to remain wholesome and worthy to enter into it's doors. People have taken the wear and symbolism out of context and consider us Mormons as peculiar and cultish because of these, yet they seem to forget that many religions and even secular events (such as a high school/college graduation...) wear ceremonious clothing and rituals.

I can honestly say, that the temple is one of my favorite places. I was married to my sweetheart for time and all eternity in the temple and have been blessed to be able to attend many times since. It is a place of refuge, of peace, of love, and a place where we go to worship our Savior, the Lord Jesus Christ.

For The Church of Jesus Christ of Latter Day Saints official statement on the television show Big Love, please read HERE

If you would like to learn more about why we go to temples, watch the video below about the blessings of the temple and a peek at what it looks like inside some of them.


For questions about our faith, please visit HERE.

To find out what members of The Church of Jesus Christ of Latter Days Saints (otherwise known as Mormons) believe about Jesus Christ, please visit HERE.


Thank you for your peace and understanding!

Wednesday, March 18, 2009

Spring and Easter Decorating


I have been bitten by the spring bug... I pulled out my speckled egg wreath the other day and was immediately inspired. My mother found a golden wire Cinderella inspired carraige she knew I would love, and grabbed it up for me (thanks mommy!!). I took some antique white acrylic paint and dry brushed the gold-leafed wires, so it has a shabby appearance and is now perfect. I can repaint it anytime! A moss covered bunny, vintage chandelier prisms and painted paper mache eggs are now at home.


My next project (hopefully) will be a moss paper mached letter, similar to this one, but in a different font. You can order yours from Simple Sweet Design.

I also took my little nest and added some bobbles and eggs that I think a robin with an eye for vintage goodness would enjoy. I put it on a candle pedestal for dimension.
bird nest shabby chic vintage bobbles


Here, I took some old brooches I haven't used in my jewelry designs yet, and added some Springtime sparkle to a boring ole lampshade.

vintage jeweled robins egg nest
decorate shabby chic lamp shade vintage jewelry brooches
Martha has a great make your own nest on her site HERE, using wire, branches and pussy willow. She has another cute nest idea where you simple double stick tape around the exterior of a bowl then wind it with pretty yarns for a fuzzy nest. She (or her craft team) is so clever. Clever as birds.

I love this egg garland on her site (tutorial HERE), I just may be making one this week, if I get my custom orders done first and feel ambitious afterwards!

Also, I new Spring Fashion inspired jewelry that I will be listing in my Jeweled Ambrosia shop the next week, so check back soon!! Here's a sneek peek....

spring fashion apple locket umbrella vintage jewelry

Also, I'm not to sure what this is all about at Cupid's Charm, but it looks exciting, and will definately be checking it out! Anything Marie, is all right by me :)


This is linked to A Soft Place to land's DIY DAY Mclinky for 2010. I haven't put my spring decor up yet, so I pulled from last season :)

Friday, March 6, 2009

Vintage Whimsy

vintgae wooden spool jeweled necklace shabby chic jewelry

I have added some of my antique shopping conquests to my shop today! I created a new line of vintage wooden spool jewelry, and one of them showcases today. Isn't she a beauty!? You can find the necklace HERE.

vintage medicine bottle, Dr. J.H. McLean volcanic liniment oil

Also, my vintage bottle lovlies are coming along. I lost one last night though, but still decided to list it in my shop. It is a vintage medicine bottle, Dr. J.H. McLean volcanic liniment oil. You can find it HERE! I thought it could make a really neat 3d mosaic or soldered pendant somehow, especially if the glass is able to be cut around the words. What do you think?

white deer head mount shabby chic

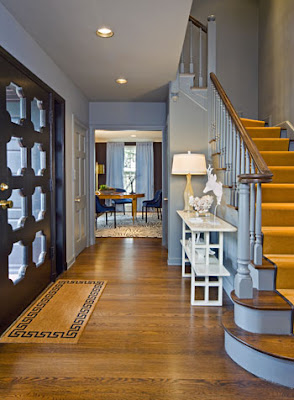
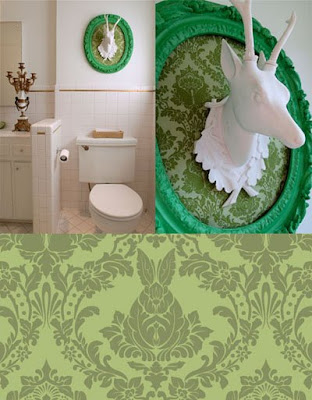
Look what I found [and bought] the other day. I haven't treated myself in a looong time, so when I saw that I sold a bracelet, I thought I would put those funds towards this sweet little thing. Minzer has several different styles in her shop and I can't wait till my white hunted deer mount arrives, I know JUST where I am going to put it too! Look at these pretty deer head decorating ideas I found.


This Young House

blue entrance stairwell white deer mount
Dallas News

white deer mount green damask fabric bathroom decor
Tula Pink

What super sweet finds have you gotten lately? This is on my *want* list, especially since Every Little Counts is retiring this line soon... (I'll take the hair and perfect skin too, anyday).

white sexy romantic vneck every little counts
Related Posts with Thumbnails