Wednesday, October 31, 2012

Downtown Studio Salon

The Downtown Studio in Historic Downtown Rosenberg is pretty much one of the most gorgeous and swankiest salons out there, filled with interesting pieces of furniture in gorgeous glazes and finsihes. The salon is flanked by lovely boutiques, antique shops and a live theater is getting ready for it's grand opening in a few weeks. And this is where I work with an amazing team of stylists.
 Front waiting room and reception area.
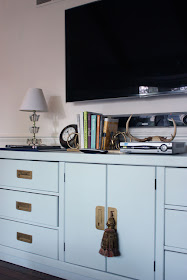
See this gold make-up dresser here? Yeah, it used to be mine here, and it got all glammed up. Just like the ladies who can sit in this area and get their make-up done and beautified right here in this front window.


 The lounge are where bridal parties, couples or, anyone can go and relax between services.
 
 Couple's massage room

 And the couples jacuzzi room.

Our ad photo for Absolutely Brazos Magazine.
 

 All Halloweened out.
Pin It
signature lisa 180x80 180ppi

Thursday, October 25, 2012

Homefront: Halloween Decoratng

Our kid corner is getting a little bit of  a spooky glam makeover this month! I added blackout curtains in a pretty magenta color (clearance for $7 a panel at Wal-Mart)... that perfectly matches my Garden Ridge floral lampshade that graces my Goodwill crystal lamp. A pretty black and white geometric area rug from Garden Ridge grounds the area and provides a soft place for our new little, 5 1/2 month old speed crawler baby. Our dresser that has served as a changing table, kitchen storage, and now a toy storage and staging area, fits this space perfectly. An IKEA poang chair for $20 from a garage sale, and cheap and sparkly goodies make this space ready for Halloween.

  
 We love our fuzzy spider, I think we should name her Harriet.
Our large, ornate frame (from a garage sale we used for our family portraits) is a perfect backdrop for a small little vignette on our Expedit bookshelf.


I am going to be mega busy this weekend, doing tons of face painting and balloons for lots of Halloween parties! Here's a fast little pretty eye design I whipped up last weekend :) I hope to get a chance to breathe and update the blog soon, but if not, I hope you all have a very safe and very happy Halloween!!

Pin It
signature lisa 180x80 180ppi

Thursday, October 18, 2012

Saturday, October 13, 2012

DIY Sonic the Hedgehog and Knuckles Halloween Costume


This is an easy, no sew project that everyone loves, especially our boys!! We got so many compliments! It's just a little time consuming to make, so don't do it right before you have to leave to go trick or treating, like I usually do. Since it's a no pattern design, you just have to "eyeball it" and make lots of revisions on cuts. Maybe cut out cereal boxes first would be a good idea.  Look at lots of Sonic pictures to get the idea, or just use my placement for the triangle spikes.

Materials: 

* blue fleece (or red for Knuckles)
* foam, about the 1 1/2 inch or 2 inch thick kind. I bought one large sheet.
* sharp scissors
* red small section of red fleece or 2 pieces of red felt (for shoes)
* one piece of yellow felt (for shoe buckles)
* white fleece, or low pile fur (for tummy, ears and strip on shoes)
* strong headband
* elastic (for under the chin, and shoe straps)
* hot glue gun
* lots of hot glue
* sweat pants and shirt (blue for Sonic, red for Knuckles)
* yellow tubing for ring (can spray paint yellow, I think we cut down a hula hoop and tape it together)


Directions.


Fleece is great because it does not fray, and you don't need to hem. I originally had the spikes going down the back, but it wasn't  comfortable, and sort of flopped, so I took the back apart, cut off the triangles and glued them to the headpiece. For the head piece, I simply cut out a large square of fleece and tucked, cut and glued on angles to make it helmet like. (Except for Knuckles, I didn't fit it to the head like this, I kept his a little longer and rolled the edges and glued them like that). I put it on my child's head to see where it sit would sit on a headband, than glued it on the headband.

Next, cut foam pieces into triangles, with slight curved sides. Cut fleece to fit and hot glue fleece to your triangles. To make a nice 'edge', glue fleece strips to outline it out, I slightly rolled it under to make it look more like a sewn finish. Look at your Sonic pictures and glue your triangles down in a pattern closest to the photos, or how I did mine.


Knuckles doesn't need these triangles. I simply rolled pieces of red fleece into 'tubes' and glued them to the underside of the headpiece. Once the head piece is shaped and done, put on child's head and add your elastic strap under the chin. I covered mine in fleece, you don't have too.

For the body, cut an oval tummy and glue it on the shirt. Sonic has flesh colored arms, so you could cut the sleeves off of the shirt, but I didn't mind the long sleeves since it was a little chilly. For the shoe covers, I simply laid the fabric over the shoes, cut a hole out over it and glue pieces together to look like Sonic's shoes (like the white band and yellow buckle). (Do not glue ON the shoe, this is just a simple shoe cover!) Glue your elastic down under the sides of the red fleece and simple slip them on over the shoe, than have your child put their shoes on.

I added this project to Cut Out + Keep. (And yes, I realize the title is badly misspelled!) If you do it, I would love to see it!


Pin It
signature lisa 180x80 180ppi

Monday, October 8, 2012

Inspired Interiors: Charmaine's Lovely Living Room


Sadie and Stella features the gorgeous room of Charmaine's from My Best Friend Craig
The look is very clean, modern and designed, yet it is still comfortable and has a neutral enough background to easily be transformed when the fancy strikes.

 This greek key mirror was a craigslist find!


The hallway, what a perfect place for a striped wall.

I'm loving the look of layered rugs, and what a neat table. I'm loving the built in bookcases, the touches of lucite, and those matching chairs.


On it's own, the fabric on this seat is dated and kind of hideous, but it is perfect when paired with a seamless brass table and eclectic elements. I love the simple touches of hot pink in this room. Be sure to read the interview and to see the shocking before photo!


Pin It
signature lisa 180x80 180ppi